
Homemade Sandwich Rolls
These homemade sandwich rolls are the perfect yeast bun to use as a vessel for any of your favourite sandwich fillings. A crispy yet soft sandwich bun is so easy to make you will never use store-bought again!
When I think of sandwiches I think about some of the best sandwiches and some of the worst I have had in my life. As kids, we have probably all have memories of PB and J’s, tuna fish, ham and cheese and Nutella. As as we get older our tastes usually change and the toppings and fillings in our sandwiches become a little more sophisticated. One fact that remains, however, is that the bread you use can make or break a sandwich.
This homemade sandwich roll recipe, like many yeast dough recipes, requires some wait time but the recipe itself is simple enough for any and everyone to follow.
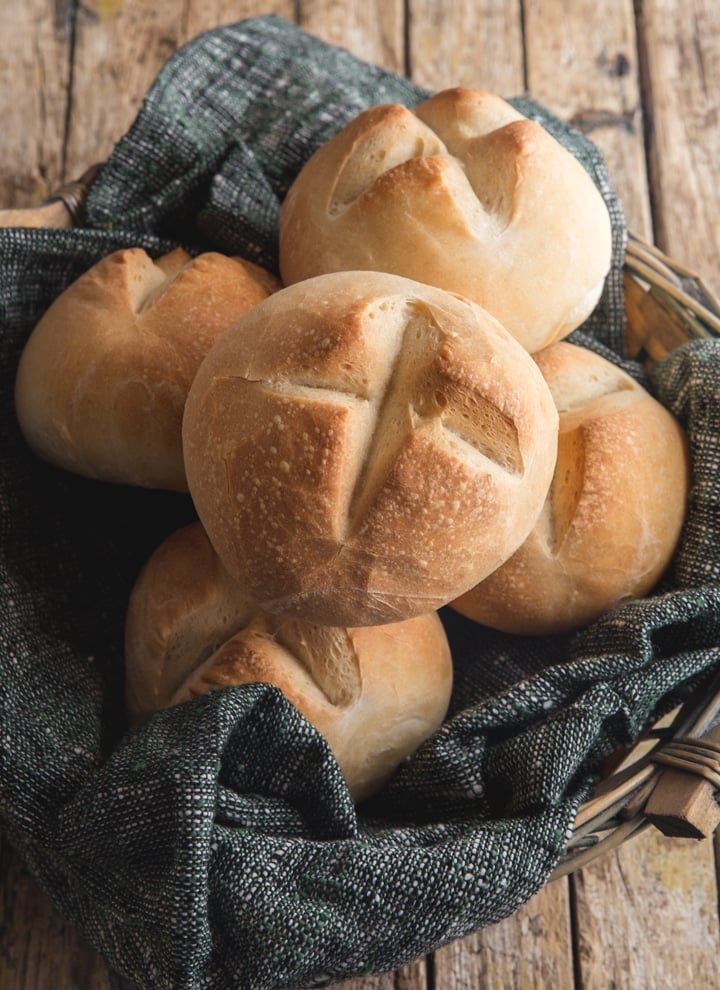
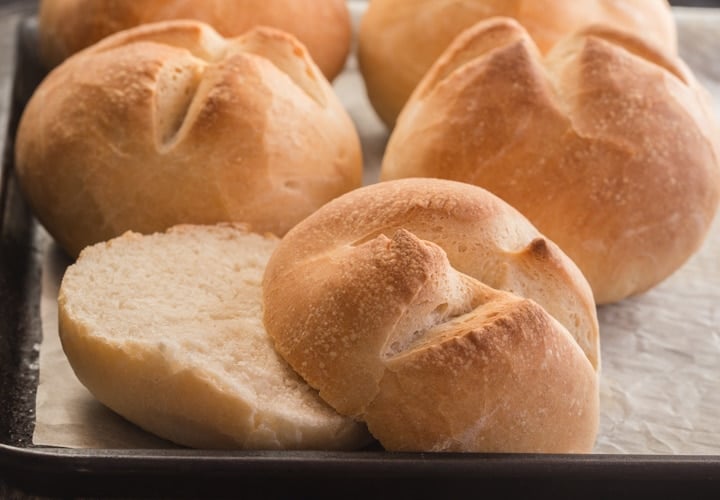
Crusty on the outside, soft and tender on the inside, these homemade sandwich rolls are used for anything from a sloppy Joe to a hamburger to a prosciutto and arugula sandwich. So good!
You will notice that in this recipe (as with most of my recipes that call for yeast) I use active dry yeast. You can, for the most part, use instant yeast if that is what you have on hand, however, if you don’t mind letting it sit for a few minutes, I say get yourself some active dry yeast.
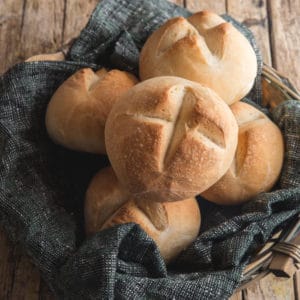
There is something so satisfying about baking homemade bread of any kind. As a sandwich bun, these homemade rolls are next-level delicious. It will definitely bring your sandwich level up a few notches.
Table of Contents
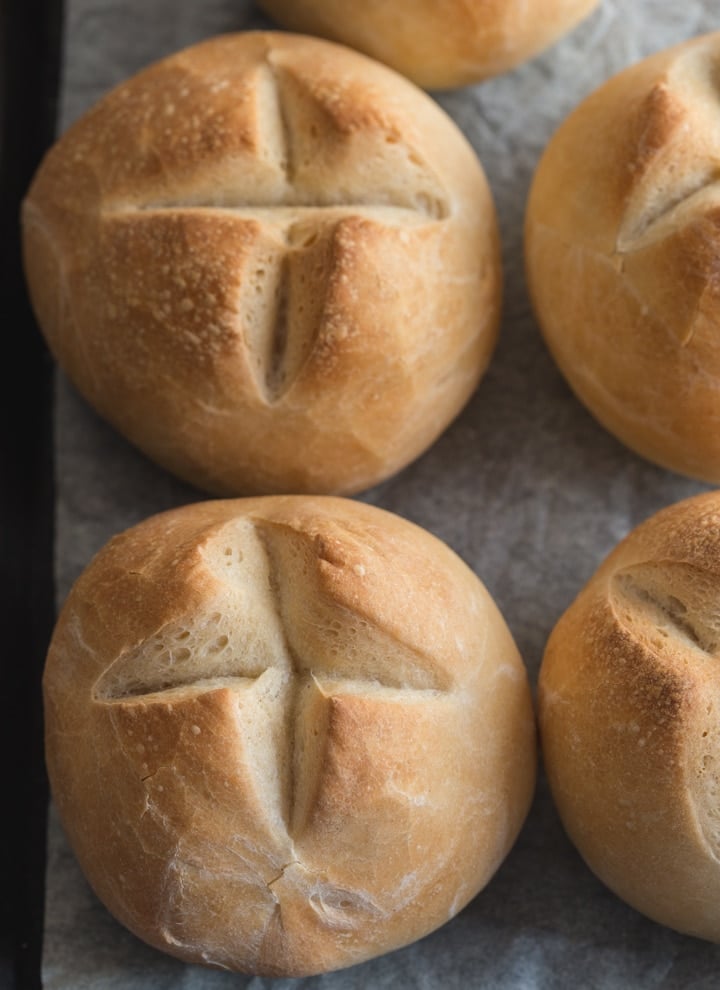
What is the purpose of scoring the top of the sandwich buns?
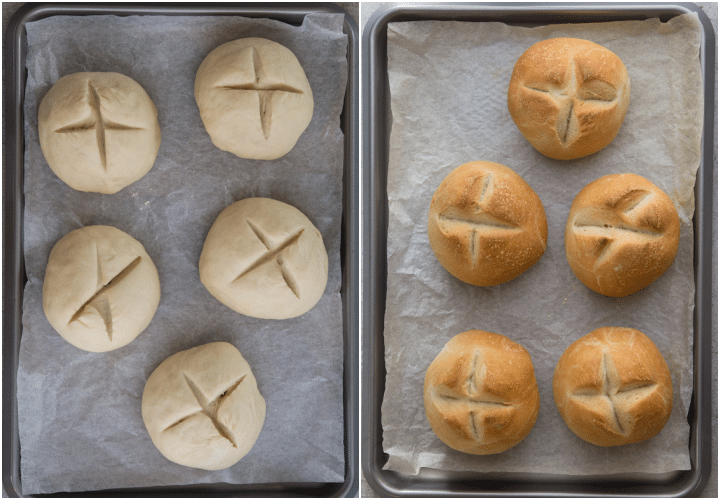
One might think scoring the top of the bread is just for decoration. And while it does add a level of fancy, it actually serves a purpose. When in the oven, the dough rises and expands. When we score the dough it gives the dough a little extra room to expand so the buns won’t end up with big air pockets.
To get a really nice looking score, remember to use a really sharp knife!
How to store homemade buns
When wrapped individually in an airtight container or plastic wrap, these homemade sandwich buns will last at room temperature for up to 5 days. Kept wrapped in plastic they will also last in the freezer for up to 2 months.
How to thaw buns without them becoming soggy
Once you take them out of the freezer place on a paper towel. Thaw half way and allow the paper towel to soak up the moisture. Flip over the buns and allow the opposite end to drain onto a paper towel. This will help allow the right amount of moisture to remain intact. Alternatively, you can put them back in the oven to crust up nicely again.
How to make homemade sandwich buns
In the bowl of your stand-up mixer (yes, you’re going to want to use one of these), mix water and sugar and sprinkle yeast on top and let sit. Stir to combine.
Add the flour and olive oil to the yeast mixture and start to knead using the dough hook. Add the salt and continue kneading until smooth and elastic.

Move the dough to a lightly floured surface and form into a ball. Place in a lightly greased bowl making sure all sides of the dough are oiled. Cover with plastic wrap and let sit and rise until doubled in size. Punch the dough (your kids will get a kick out of this part!) and divide it into 5 equal portions.
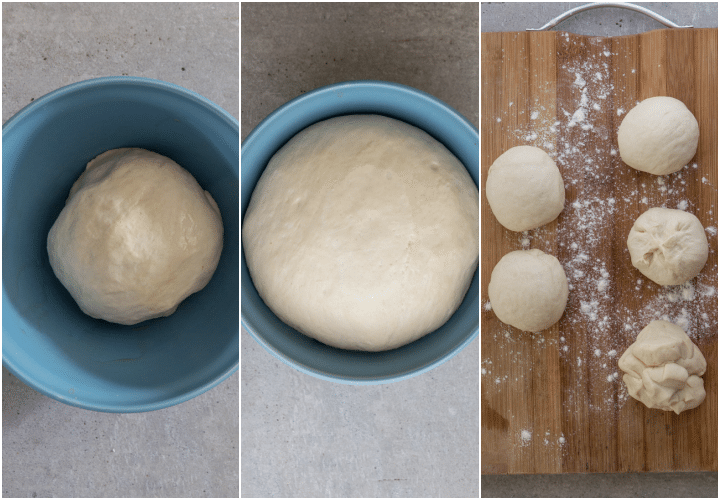
Form into smooth balls and place on parchment-lined cookie sheet. Cover with a clean tea towel and let rise again.

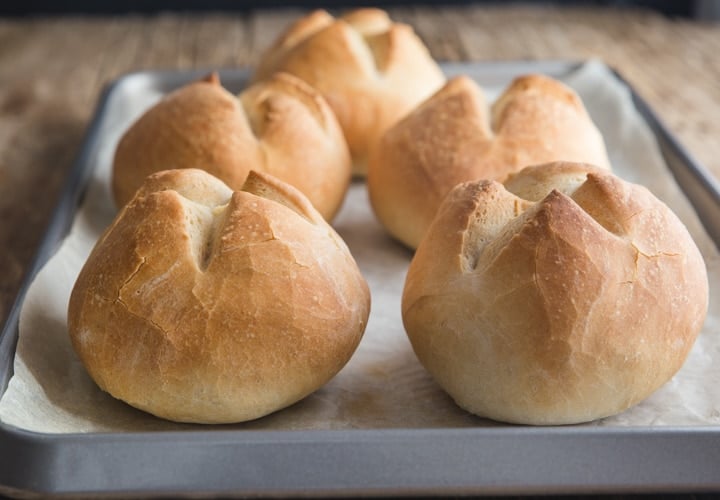
Preheat the oven and place an empty oven-safe tin into the oven on the bottom rack. Score the tops of the buns and then pour hot water into the empty pan. Immediately place the pan with the buns onto the rack above and bake until ready.
The reason for the water in the pan is to create steam, a very important step for keeping the surface of the dough moist.
For a shinier top coat on your buns, you can use a bit of melted butter to create that sheen but not a necessary addition.
Once finished, remove to cool. Fill it with your favourite sandwich toppings and enjoy the BEST sandwich!
Homemade Sandwich Rolls
Ingredients
- 1/2 cup + 3 tablespoons lukewarm water (105F / 40C)
- 1 pinch granulated sugar
- 1 1/4 teaspoons active dry yeast
- 2 1/4 cups + 2 1/2 tablespoons all purpose flour or bread flour
- 1 tablespoon olive oil
- 1 1/4 teaspoon salt
Instructions
- In the mixing bowl mix the water and sugar, sprinkle the yeast on top, wait 5 minutes then stir to combine.
- To the mixture add the flour and olive oil start to knead with the dough hook then add the salt and continue to knead for 4 minutes until smooth and elastic. Move the dough to a lightly floured flat surface and form into a ball, place in a lightly greased bowl, roll the dough in the bowl to lightly cover with oil. Cover the bowl with plastic wrap, let rise in a warm draft free area for 1 1/2 – 2 hours or until doubled in bulk.
- Punch the dough down and divide into 5 equal portions, form into a smooth ball, place on a parchment paper lined cookie sheet, cover with a clean tea towel and let rise 45-60 minutes.
- Pre-heat oven to 425F (215C). Place an empty oven safe tin in the oven.
- Make a cross with a sharp knife on every roll, pour one cup of hot water in the pan and quickly place the rolls in the oven. Bake for approximately 20 minutes. Immediately place on a wire rack to cool. Enjoy!
Nutrition
[mailerlite_form form_id=1]
Do you poor the water into the pan WITH the rolls or in a separate pan?
Hi Caitlyn, no, you pour the water in the pan that’s been inside the oven pre-heating and then place the rolls in the oven on their own baking sheet.
This recipe is very confusing. I had to add more water cause my dough was so dry and crumbled not forming together. Then the whole pan in the oven then add water to WHAT pan? Also is this pan directly on top of the other or on a diff rack? I’m confused?
Pre-heat oven to 425F (215C). Place an empty oven safe tin in the oven.
Make a cross with a sharp knife on every roll, pour one cup of hot water in the pan and quickly place the rolls in the oven.
Hi Kindra, the pan is the empty pan you’re placing in the oven (lower rack) when you start pre-heating it. You add the water to that pan when the oven is ready and then you add your bread in the oven in its own pan. The pan with the water is placed underneath the bread one. The water adds steam to the baking process and gives the bread a nice crust.
Every flour is different, yours might have been a very thirsty kind and needs more hydration compared to the one we used. I hope this helps!
This was a trust the process recipe. I thought judging by the dough these would be too dense and chewy. I was pleasantly surprised though. They are not too dense and I have found it hard to find a recipe where the buns are sturdy enough to hold their contents. I found my new go to recipe, very happy!
Hi Jordyn! I’m glad you liked this recipe! 😊 Enjoy!
There is no way that is enough water for that much flour. I’m doubling the batch and I have a very dry ball of dough with lots of extra flour laying on my cupboard. I don’t have a mixer and have always kneaded by hand with no issue. Not sure how anyone was able to make these as the recipe states.
Hi, some flours absorb liquid differently from others, try adding more water that should solve the problem. It worked for us with the measurements we wrote down.
Just added a couple table spoons of water and it was perfect. Gotta be able to adjust here and there.
I don’t have a stand mixer. Could I just stir it by hand?
Hi Aurora, yes you could knead the dough by hand, it will take about 15-20 minutes of kneading. Let me know how it goes.
Great recipe! The crumb is excellent. The crust is perfect. Made these yesterday and gonna make another batch today and shape them into torpedoes instead of rounds. Thanks so much!
Thanks so much Guy, so glad you like the recipe. Have a great week.
Be careful when increasing the recipe it does not increase the gram amount something that I did not realize until after.
Hi Carolyn, thanks for letting me know, I have corrected it.
These were amazing! I am sure I will be making these on repeat!
Hi Joanna, thanks so much, so glad you enjoyed them. Have a wonderful Sunday.
The best Italian buns I’ve made thank you
Thanks so much Frances, glad you enjoyed them. Have a great week.
Sorry Rosemary must of been in the moon, notice metric measurements for flour and water
Hi Pina, no problem. 🙂
Ummmm, how much flour you said 2 1/4 plus 2 1/2????
Hi Lori, 2 1/4 cups + 2 1/2 tablespoons as written in the instructions. Thanks.